The Account Prospect Entry program is used to enter and maintain prospect information for national accounts. The Account Prospect Entry programs include options to allow entry of contact information, special instructions, and billing information. Memo information can be entered for each prospect and national account. The appointment scheduling screen can be accessed from this program. Prospective moves that turn into actual moves can be automatically updated to the appropriate order file in the Vans system.
Screens
Name |
Description |
Select new or existing prospects. |
|
Enter or review contact and general prospect information. |
|
View and maintain information regarding prospect contact information, such as the number of contacts made, the last date a contact was made, next date to contact and more. This screen also includes information about contact letters. |
|
Enter or review user defined information and information on contact letters. |
|
Enter or review notes on specific prospects. |
|
Create an A/R customer record from existing prospect information. |
|
Create and enter prospect as a national account. |
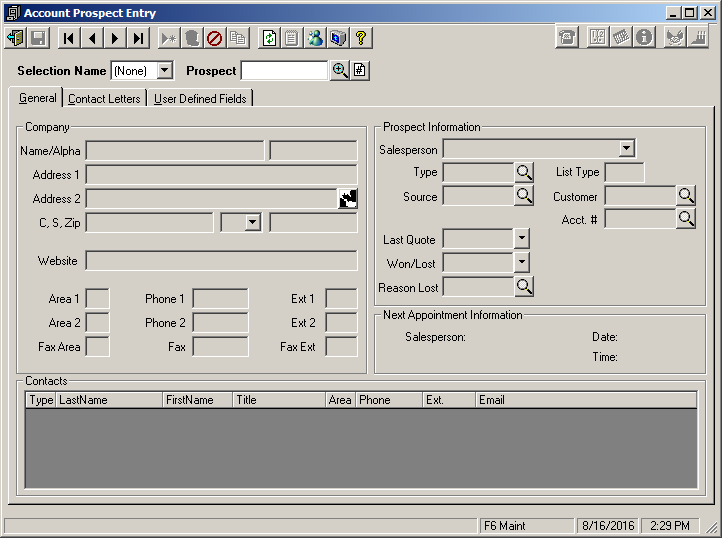
Account Prospect Entry Screen
This is the Account Prospect Entry screen as it first appears. No data shows, and the contact grid is empty. At this point, the only field enabled is the Search by box. This box allows you to select the method by which to select prospects. The default is by Prospect Number. After selecting the search by method, you should click the  lookup icon to display a list of prospects sorted according to the search by method selected. If the prospect number is known, you can enter it directly into the text box and press the Tab key and if found the selected prospect will be displayed, but if not found, the system will assume that you are entering a new prospect and place the cursor in the Prospect Name field.
Add Account Prospect
1.From the toolbar, select Transactions then Account Prospect Entry. Account Prospect Entry is a secure form, so the first time it is opened, you may be required to use the SalesTrak Login Security form to validate your sales login.
2.Click on the  icon to add a new record. If the Next Prospect Number for Accounts field in the SalesTrak Control file has a value, the system will automatically assign the prospect number, otherwise, you must enter it manually before a new prospect can be added.
3.Complete the Prospect Information as needed on the General, Contact Letters and User Defined Fields tabs.
4.Click the  icon to save the record. When saving a prospect record, if any required user-defined fields are left blank and they are setup with the Auto Pop-Up feature, a window will be opened prompting for an entry. In this case, you must enter a valid response for any and all such fields before you will be allowed to save the record.
Note: As you switch from one tab to another, the system may prompt you to save changes. This is normal if any field on the current tab was changed, but if you do not save the changes before switching tabs, any changes you did make will be lost when you switch back to the original tab.
Display Existing Account Prospect
1.Select the Search by method.
2.Click the icon to display all appropriate prospects.
3.Select the prospect.
 Tip: The prospect number may be entered directly in the box next to the icon. Hit the Tab key to display the prospect record.
Note: If a prospect number is entered in the prospect number text box and it is not currently assigned to an existing prospect record, the system will attempt to add a new prospect record. If this happens inadvertently, it can be canceled by clicking the  cancel icon in the toolbar, or by exiting the form, and answering No to save the changes.
Field Descriptions
Name |
Description |
Selection Name |
Select the selection file you want to use. If a selection file is used, all functions (e.g., find, next, etc.) are based on the selection file. This options is only valid if the sort method is Selection File. |
Prospect Number |
This field displays the prospect number assigned to this prospect. This number is used to identify the prospect in the SalesTrak system. If the Next Prospect Number For Accounts field in the SalestTrak Control file is assigned, then this number is assigned automatically by the system, otherwise it must be entered manually when adding an order. Once a prospect number is assigned, it can not be changed. |
|
This button is used to lookup existing prospects. The lookup method can be set by right-clicking the button and selecting from one of the following options: Prospect Number, Alpha Code, Phone Number, Next Contact |
|
Click the |
|
The Add Contact icon opens the Contacts form so that additional contact records can be added for this prospect. This can also be done by using the right mouse button while positioned in the grid and choosing the Add Contact option. |
|
This icon is used to update contact information on a prospect. This automatically adds a memo, and updates the contact fields at the bottom of the form. |
|
This icon is used to open the scheduling form. The scheduling form will open to todays date, and the displayed prospect currently will be used as the default prospect for the next appointment you schedule. The appointment information section of this form displays information on the next scheduled appointment for this prospect. |
|
This is the View Next Appointment icon. If this Prospect does have an appointment scheduled in the future, this icon will be enabled. Clicking it will take you to the Appointment Scheduling form, with this appointment page loaded. |
|
The Appointment Inquiry icon is used to see a basic list of all appointments for this prospect including the date and time, estimated hours, salesperson assigned and the appointment comments. Appointments can not be modified from this screen. |
|
This button is used to Create a Customer from the prospect record. This button is disabled for prospects that are already have valid A/R customer codes entered in the customer field. |
|
This button is used to Create a National Account from the prospect record. This button is disabled for existing national accounts. |


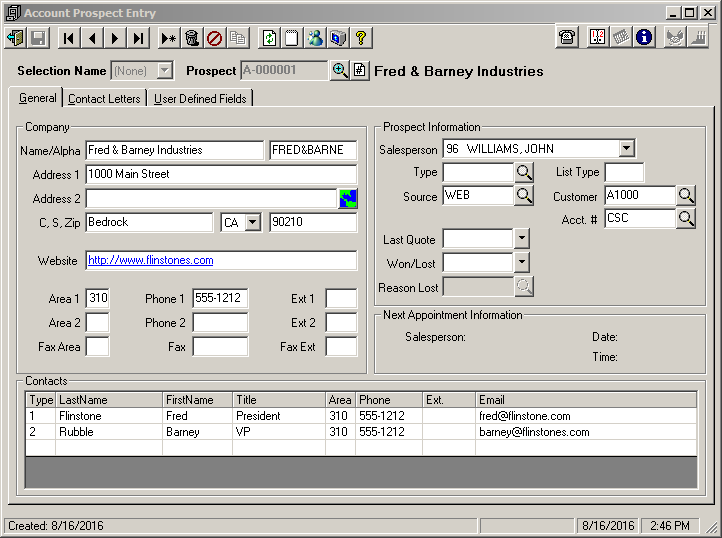
Prospect General Information
The most important account prospect information to have quick access to is found on this tab, including address information, primary phone numbers, important dates, and contacts. The telephone icon  is used to record a contact with the prospect. Clicking this button will update the information in the fields for contact dates found on the Account Prospect Entry Contact Letters tab. The scheduling form can be directly accessed from this form by clicking the calendar icon on the toolbar
  . The prospect currently displayed will be the default prospect for the new appointment. If the current prospect has a next appointment showing in the next appointment fields, clicking the calendar icon opens the scheduling form to the appointment indicated in these fields.
The Copy From feature allows you to create a new prospect by importing information from an existing prospect. The information that does not get imported includes prospect-specific type fields, such as next appointment, number of times contacted, etc. To use the Copy From feature, first click the New toolbar button. This will generate a new Prospect number, and set the focus to the Company Name field. To then import an existing Prospects information, click the Copy From  icon on the toolbar. This will bring up a Lookup Form with existing Prospects loaded. Selecting a prospect will load this form with the appropriate information from the selected prospect. The focus will again be on the Company Name field, and the name of the new prospect should be entered here at this time. To save this record, click the Save icon in the toolbar.
Field Descriptions
Name |
Description |
Company |
|
Name |
This field contains the prospect's name. This field can be up to thirty (30) alphanumeric characters. It is recommended to set this to the name of the business or company that you are attempting to contact. The individual people that you may be contacting should be listed in the Contacts section. In addition, if the billing information is known, it should be entered in the Customer field. |
Alpha |
Just to the right of the Name field, the Alpha field contains the prospect's alpha code. It defaults to the first 10 characters of the name but can be edited as required. |
Address 1 |
This field contains the first line of the prospect's address. This field is normally used for the street address. |
Address 2 |
This field contains the second line of the prospect's address. This field can be use for additional address information (e.g., suite number, etc.). |
|
Clicking the Map Button Icon next to the Address 2 field opens the default Internet browser and the selected map interface and attempts to locate this address. |
C,S,Zip |
These three fields are used for the city, state, and zip for the prospect's address. |
Website |
This field contains a link to the prospect's website. The default browser is used to display the website. |
Area 1 |
This field contains the area code of the first phone number. |
Phone 1 |
This field contains the first phone number. |
Ext 1 |
This field contains the extension number of the first phone number. |
Area 2 |
This field contains the area code of the second phone number. |
Phone 2 |
This field contains the second phone number. |
Ext 2 |
This field contains the extension number of the second phone number. |
Fax Area |
This field contains the area code of the fax phone number. |
Fax |
This field contains the fax phone number. |
Fax Ext |
This field contains the extension number of the fax phone number. |
Prospect Information |
|
Salesperson |
This field displays the salesperson currently assigned to this prospect. |
Type |
This field indicates the prospect type (e.g., Household Goods, Interstate, Office & Industrial, etc.) and can be up to ten (10) alphanumeric characters. If the Prospect Type file is setup, then an entry may be required depending on the Allow Empty Prospect Type setting in the SalesTrak Control file. |
Source |
This field indicates the Source of this lead (e.g., Phone book, Radio add, Customer referral, etc.) and can be up to ten (10) alphanumeric characters. If the Source file is setup, then an entry may be required depending on the Allow Empty Source setting in the SalesTrak Control file. |
Last Quote |
This field contains the date of the last quote for this prospect. |
Won/Lost |
This field displays the date the move was won or lost. This date is used to select the prospects that appear on the List Prospects report. |
Reason Lost |
This field contains the reason the current prospect declined quoted job. |
List Type |
This is a user defined field. |
Customer |
If this prospect is an existing customer, the Customer Code can be entered in this field. If this prospect is not an existing customer, you can use the |
Acct. # |
This field contains the prospect's National Account number. If this prospect does not have a National Account record and you wish to create one, use the |
Note: The appointment information displayed in the Next Appointment Information section is for reference only. Changes to the appointment must be made through the Appointment Scheduling form. |
|
|
|
Next Appointment Information |
If an appointment exists for this prospect that is dated in the future, it will be displayed here. If more than one appointment exists, then only the next appointment will be displayed. The system will display the salesperson that this appointment is assigned to including the date and time of the appointment. |
Contacts |
This section displays the contacts for the prospect. The Contacts grid can contain an unlimited number of contacts for each prospect, but are not displayed until a prospect record is selected. Contacts can be edited, additional contacts can be added, or contacts can be e-mailed by right clicking on a contact and choosing the desired action. When adding or modifying a contact record, the Contacts form will be opened, but will only allow access to contacts assigned to the current prospect. |
Type |
Contact Type |
Last Name |
This filed contains the contact's last name. |
First Name |
This field displays the contacts first name. |
Area / Phone / Ext |
The Phone number information is defaulted from the prospect Phone 1 fields upon initially adding a contact, but can be changed through the Contacts form. |
Title |
This field displays the contacts position or title. |
This field contains the contact's e-mail address. Entering an e-mail address for a contact enables the e-mail option when you click the right mouse button while highlighting a contact entry in the contact grid. |
|

Contact Letters
The contact letter section contains information on letters sent to contacts for this prospect.

Field Descriptions
Name |
Description |
Number of Contacts |
This field displays the number of times the prospect has been contacted. This field is incremented automatically when the contacted icon is clicked. |
Last Contact |
This field displays the date of the last contact with the prospect. This field is updated automatically when clicking the contacted icon, but can also be adjusted manually. |
Contact Frequency |
This field displays the average number of days between contacts. |
Next Contact |
This field displays the next planned or scheduled contact with the prospect. This field is updated when the contacted icon is clicked. |
Comments |
These comments are used for reference purposes only, but will also print on the Contact List report. You may type up to fifty (50) characters in the comments field. |
Last Mailing |
This field displays the last date written correspondence was last sent to the prospect. |
Letter Group |
This field displays the code of the letter that will be printed for this prospect. The Contacts field determines which prospects will receive the letter. |
Contacts |
This field displays the contacts that will receive the letter indicated in the Letter Group field. The letter will be printed for each checked prospect. |
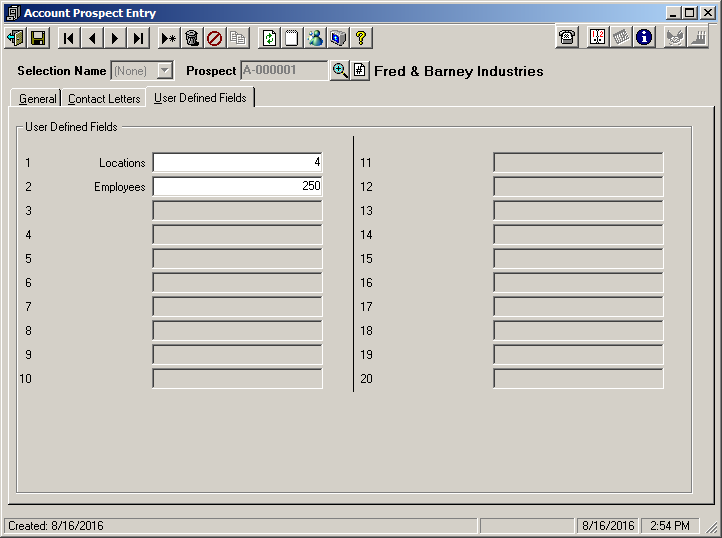
User Defined Fields
The user defined fields section contains twenty fields that are defined in Options and Interfaces, and in the Valid Entry file.
Field Descriptions
The user defined fields section contains 20 fields available for user-defined categories. These fields are defined up in Options and Interfaces.
Some fields may have a lookup icon next to them. The lookup button next to any user-defined box brings up a lookup screen that displays all the available choices for that field. If a Valid Entry has been set up for the user-defined field, you must enter one of the valid entries. If valid entries have not been set up, any value (of the chosen data type) can be entered. If a field name is not assigned to a field (through the Control file), the field cannot be accessed.
When saving a prospect record, if any required user-defined fields are left blank and they are setup with the Auto Pop-Up feature, a window will be opened prompting for an entry. In this case, you must enter a valid response for any and all such fields before you will be allowed to save the record.
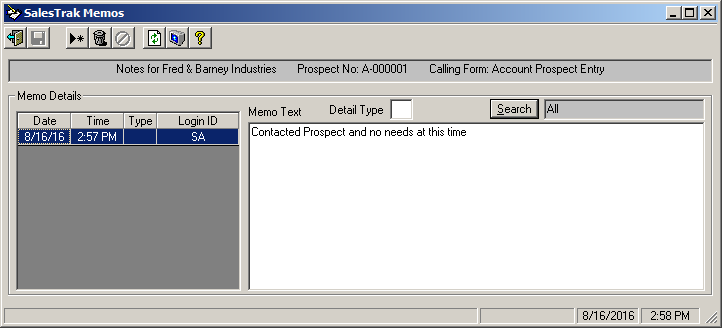
The Memos button  , opens a screen displaying all memos associated with the current prospect. When opened, the current prospect name, prospect number and calling form display in the first field.
When an existing memo is available for the current prospect the memo icon appears as:
When there are no memos for the current prospect, the memo icon appears as: 
Field Descriptions
Field |
Descriptions |
|
Enter a value to search for. Only memos containing that search phrase will be returned. |
Date & Time |
These fields indicate the date and time the memo was added to the system. They also determine when the memo can be deleted. Memos can only be deleted the day they are entered. |
User ID |
This field displays the name of the user who entered the memo. |
Memo Text |
This field contains the text of the memo. |
Memo Type |
This field determines the memo type. Types can be used to classify memos. For example, you can have one type for claims, another one for pre-move contacts, etc. |

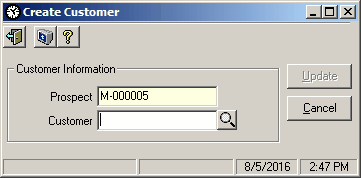
Create Customer
This form is used to create an A/R Customer record from the displayed prospect record.
To create a customer:
1.Display the prospect as described above.
2.Click the  icon to display the Create Customer form.
3.Enter the Customer Code to be assigned to the new national account.
4.Click  to create the customer record.
Field Descriptions
Name |
Description |
Prospect |
The Prospect number is pre-loaded from information in the Prospect screen. |
Customer |
Lookup displays existing accounts. Enter or select appropriate customer code. |
|
This button is used to update account information and create the customer record. |
|
This button is used to cancel any changes and close window. The customer record will not be created. |

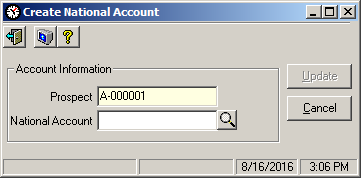
Create National Account
This form is used to create a national account record from the displayed prospect record.
To create a national account:
1.Display the prospect as described above.
2.Click the  icon to display the Create National Account form.
3.Enter the National Account No to be assigned to the new national account.
4.Click to create the national account record.
Field Descriptions
Name |
Description |
Prospect |
The Prospect number is pre-loaded from information in the Prospect screen. |
National |
Lookup displays existing accounts. Select appropriate account number. |
|
This button is used to update account information and create the national account record. |
|
This button is used to cancel any changes and close window. The national account record will not be created. |