The SalesTrak Valid Entry screen is where the valid entries for user-defined fields are maintained. The Valid Entry screen allows you to limit the entries that are accepted in the user-defined fields in the Prospect Entry and Account Prospect Entry screens so that these user-defined fields allow only the entries that you define through this Valid Entry form.
In addition, when valid entries are setup, a  lookup icon will be added next to the field so that users can look up valid entries for this field. Although this setup is optional, it can help maintain uniform and accurate data for these user-defined fields.
Screens
Name |
Description |
This screen is where user-defined types are defined, and can be looked up. |
|
Instructions on changing and deleting individual entries or all entries for a specific field. |
|
This feature when setup, causes a pop-up window to display a message and prompt the user for a valid entry for that specific required user-defined field. |
|
A Valid Entry report can be printed to either a printer or back to the screen. |
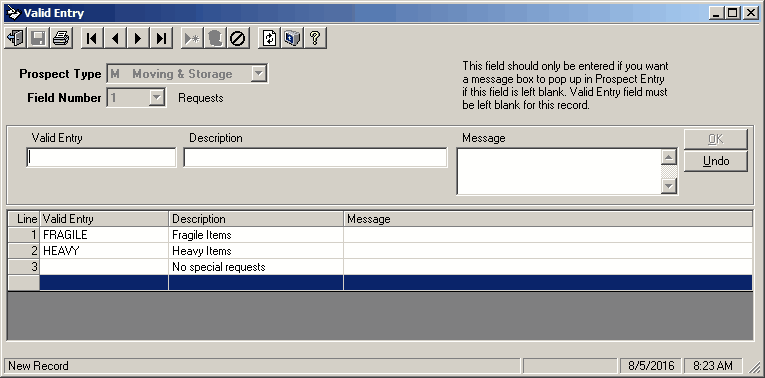
Valid Entry Screen
This screen is used to define valid entries for the user defined fields.
To set up a new valid entry:
1.From the menu, select Valid Entry.
2.Select the Prospect Type (Moving & Storage or Account) and the Field Number you wish to set up a valid entry for.
3.In the Valid Entry text box, enter the characters that you wish to allow as an individual entry for this field.
4.Enter the Description of the entry. This description will be displayed in the lookup window next to the valid entry for this field.
5.The Message can be left blank. A message should only be entered when the Auto Pop-Up feature is being used. Refer to the Auto Pop-Up section for instructions.
6.If you are adding an additional entry, you will need to click on a new (blank) line in the grid or right-click anywhere in the grid and choose the "Insert Line" option, then follow the steps above.
7.Click the  to save this entry. (You can also click the icon in the tool bar to save the entry.
Note: When you click on an individual line in the grid, the line that you were previously viewing/modifying will automatically be saved when you select another line.
Field Descriptions
Name |
Description |
Prospect Type |
Select the prospect type code that identifies the corresponding field on the Prospect Entry. The code M is used for fields on the Prospect Entry form and the code A is used for fields on the Account Prospect Entry form. |
Field Number |
The field numbers listed correspond only to the available user-defined fields on either the Prospect Entry screen or the Account Prospect Entry screen, based on the Prospect Type selection. Select the user-defined field number from the list that this valid entry setup will apply to. Refer to the user defined field setup for the Account Prospect Entry or Prospect Entry forms in the SalesTrak Control file for more information about the user-defined fields. |
Valid Entry |
The Valid Entry text box is where the actual field value that you wish to allow can be entered or modified. Each field can have as many valid entries as needed. If a valid entry is not set up, the system assumes that a Valid Entry is not required and will allow anything to be entered. If one or more entries are set up, only these entries will be accepted. A valid entry can be up to 20 characters in length. |
Description |
The Description text box is used to enter a description of what should be entered in this specific field. For example, to set up a valid source code for the yellow pages, enter “YP” as the valid entry and “Yellow Pages” as the description (without quotes). This description displays with the valid entry when a lookup is done on the valid entry. The description field may be up to 30 characters in length. |
Message |
The text in this box is used to create an auto pop-up window to prompt the user for the required information. The pop-up window only displays if the user saves the prospect record without entering the required information. |
Changing/Deleting
To change an existing valid entry:
1.View the desired Valid Entry by selecting the correct Prospect Type and Field Number.
2.Click on the line you wish to edit and the line details will be moved into the edit boxes above the grid.
3.Change as needed then click  or to save the line.
To delete an individual valid entry line:
1.View the desired Valid Entry by selecting the correct Prospect Type and Field Number.
2.Right-click on the line you wish to delete, then choose the 'Delete Line' option
OR:
1.Click on the line you wish to edit and the line details will be moved into the edit boxes above the grid.
2.Clear all three fields then click or and the line will be removed.
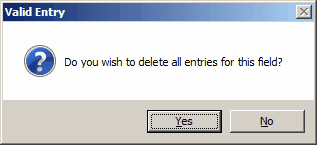
To delete an all valid entry lines for a specific field:
1.View the desired Valid Entry by selecting the correct Prospect Type and Field Number.
2.In the toolbar, click the  icon. A confirmation window will be displayed prompting you to confirm the delete.
3.If this is the correct record, click the  to delete all valid entry records for this field.
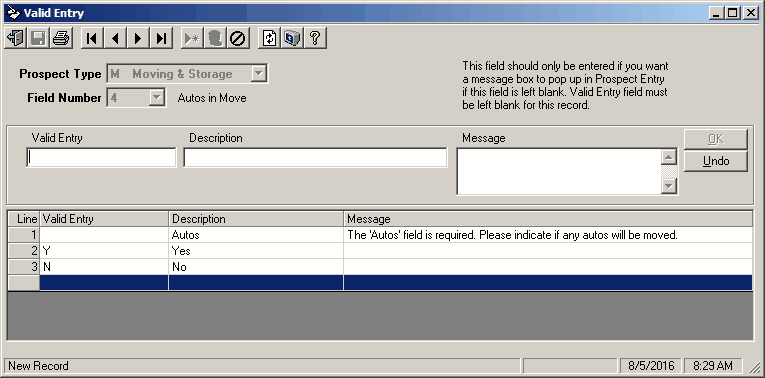
Auto Pop-Up Entry Box for Required Fields
In addition to setting up valid entries for user-defined fields, there is also a feature that can be enabled for required user-defined fields to streamline the entry process. When setup, this feature causes a pop-up window to display a message and prompt the user for a valid entry for that specific user-defined field. This pop-up window displays only if a save is attempted and the required user-defined field does not have a valid entry.
To set up a field to have the auto pop-up entry feature:
1.From the menu, select Valid Entry.
2.Select the Prospect Type and Field Number.
3.Create a new Valid Entry line by clicking in the last line in the Valid Entry grid, or by using the insert line feature in the Valid Entry gird.
4.Leave the Valid Entry and Description fields blank.
5.Enter the text that you wish to be displayed in the box labeled Message. This is the text that will appear in the pop-up window for the selected field.
6.Click the icon to save the record. (You can also save the record by clicking the OK button.)
 Tip: To make a blank field a valid entry for this user-defined field, leave the Valid Entry field blank, enter a description ("blank field" or equivalent), but DO NOT enter any text in the Message Box Text field.
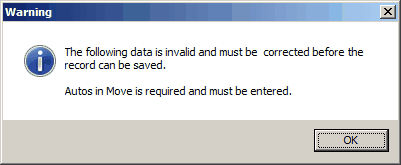
Auto Pop-Up Example:
The following pop-up window was generated from Prospect Entry when a Move Prospect was attempted to be saved without entering the required data in the User-Defined 'Autos' field:
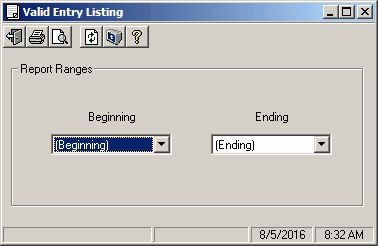
Valid Entry Report
This screen is used to print reports for the valid entries that have been defined.
To print a list of the valid entries:
1.From the Report menu, select Valid Entry Report or click the  icon on the Valid Entry screen.
2.Enter the Beginning and Ending valid entries you want printed on the report. To select all valid entries, leave the boxes with the default (Beginning) and (Ending) values. To select a single valid entry, choose this entry in both boxes.
3.Click the  icon to view the report on the screen. Click the icon to send the report to a printer.
Field Descriptions
Name |
Description |
Beginning |
This box is used to choose the beginning valid entry for the report. |
Ending |
This box is used to select the ending valid entry for the report. |