The Prospect Type form is used to set up the valid codes and descriptions that are used to categorize different types of prospects. Prospect Types must be setup for use on Move Prospects or Account Prospects, but not both. The Lookup can be used to find existing Prospect Types, or new ones can be added with this form. This form supports the “Copy From” method, which enables the user to create a new record using the fields of an existing record. To use this feature, first click the “New Record” icon in the toolbar. This will set the focus to the Prospect Type field. Enter the code of the new prospect type, then press the “Tab” key on the keyboard. This will move the focus to the Description field in the form. Click the Copy From  icon in the toolbar, and a Lookup Form will load with all existing prospect types shown. Choose one of the existing types, then press “OK” on the lookup form. This will populate the fields in the form with the values from the prospect type selected in the Lookup Form.
Create Prospect Type
1.Select Maintenance then Prospect Type
2.Enter the Prospect Type.
3.Enter a Description of the type.
4.If this type will be used for Account Prospects only, then check the Account Prospect box, otherwise if this type will only be used for Move Prospects, leave the box un-checked.
5.Click the  icon to save the record.

Field Descriptions
Name |
Description |
Prospect Type |
This field is used to enter a new prospect type code, or display an existing prospect type. This code may be up to ten (10) alphanumeric characters. The code should be named to be as descriptive as possible so that the purpose is obvious. An example of a commonly used code would be "HHG". This is generally used for Household Goods prospect types. Another common example would be "INTRA" for Intrastate moves. |
Description |
This box is used for a description of the prospect type. This description prints/displays on reports and inquiries. |
Account Prospect |
This check box is used to select which form this Prospect type will be used in. If this box is checked, than this type can only be used in Account Prospect Entry. If this box is not checked, then it can only be used in Prospect Entry. |
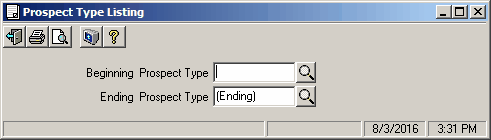
Prospect Type Report
This screen is used to print reports on prospect types to either a printer or to the screen.
To print a list of the valid entries:
1.Click the  icon on the Prospect Type screen.
2.Enter the Beginning and Ending valid entries you want printed on the report. To select all valid types, leave the boxes with the default (Beginning) and (Ending) values. To select a single type, choose this entry in both boxes.
3.Click the  icon to view the report on the screen. Click the icon to send the report to a printer.
Field Descriptions
Name |
Description |
Beginning Prospect Type |
Enter the beginning Prospect Type, use the |
Ending Prospect Type |
Enter the ending Prospect Type, use the |
 lookup button to select, or leave blank (displayed as Beginning) to start with the first on file.