Described in the table below are the right-click options available from the main data grid in Dispatch Center.
Figure 7: Right-click options available from the Dispatch Center tab
|
Option |
Description |
|
Shipment Status |
This option displays the current status assigned to the order along with the following menu options:
Set Shipment Status Opens the Shipment Status History screen to view a historical progression of the order
Set History Opens the Shipment Status History dialog allowing the user to manually set the current status
|
|
Edit Crew |
This function opens the Assign Crew screen to set crew role, lead, and start/end times. |
|
Edit Equipment Times |
Opens the Edit Equipment Times screen allowing the dispatcher to set job starting and ending times for equipment resources. See Update Crew and Equipment for more information. |
|
CPU |
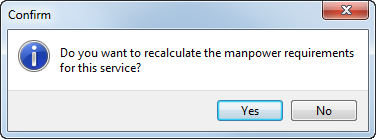
This function opens the Update Containers, Packing and Unpacking screen allowing a user to update the estimate counts for materials of the order. Related to this function is the CPU option available through the Enter Actuals button allowing you to update the actual counts (this button is available from the Dispatch Center). If data is behind this option, then the option displays in bold font: CPU. When making changes to the CPU counts through this option and Save is pressed, the application prompts you to recalculate the manpower for the service.
Figure 8: Confirm dialog Pressing “Yes” opens the Add Local Service dialog, allowing you to verify and recalculate the amounts associated to the service. Pressing “No” closes the dialog and returns you back to the Dispatch Center. |
|
Container Tracking |
Opens the Container Management screen allowing you to view and update containers assignments for the particular order you have selected in the grid. Options within the screen provide the ability to search for other orders, containers, etc. See Container Tracking for more information. |
|
Containerization Status |
If the service is containerization eligible, you can assign status values from this option. The options available are defined within Containerization Status Setup. Both Containerization Eligible and Containerization Status are columns within the Dispatch Center grid. |
|
Dispatch Status |
Users can select a status for the service from the list of those defined within Local Dispatch Status Setup. See Dispatch Status for more information.
Note: MoversSuite can be set up to automatically send email messages to key personnel when the dispatch status has changed (see Email Options Setup).
|
|
Void Work Ticket |
Choosing this option voids the work ticket associated to the service and voids all services linked to the work ticket. Voiding a work ticket removes all assignments made to services associated to the ticket. Revenue associated to the services will not be available to import through Import Actuals in Revenue Entry. Voided services no longer appear within the Dispatch Center grid, but do display within the Local Services tab for the order with a Status of “Voided.” The Work Ticket Report displays within a “VOID” across the top of the report. |
|
Reset Grid Layout |
This option changes the grid layout back to the application defaults. See Data Grids for more information. |
|
Export To |
This option allows exports grid data to Microsoft Excel worksheet or HTML window. See Export To for details. |
Described in the table below are the right-click options available from the crew and equipment assignment grids in Dispatch Center.
|
Option |
Description |
|
Auto Assign to Service |
This option automatically assigns one or more crew member(s) to the selected service without opening the Assign Crew screen. See Auto Assign Crew for more information. |
|
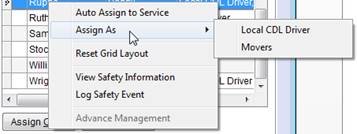
Assign Crew Assign As |
Click this option to assign the employee to the selected service or services. If the option reads “Assign As,” then more than one Labor Type is associated to the Personnel Setup record and a selector is provided.
Figure 9: Assign As option in the Assign Crew grid
|
|
Reset Grid Layout |
This option changes the grid layout back to the application defaults. See Data Grids for more information.
Note: This option is also available to more than one selected record.
|
|
View Safety Information |
This option opens the Safety Information screen to view key safety data on the selected member of the crew or equipment resource. Users can log safety events logged through this screen as well. |
|
Log Safety Event |
This option opens the Log Safety Event screen. |
|
Advance Management Advance As |
This option opens the Advance Management screen allowing a user to manage driver advances. If more than one Labor Type is available for a person, then the Advance As option appears allowing the user to select from the list of roles associated to their Personnel Setup record. See Advance Management for more information. |