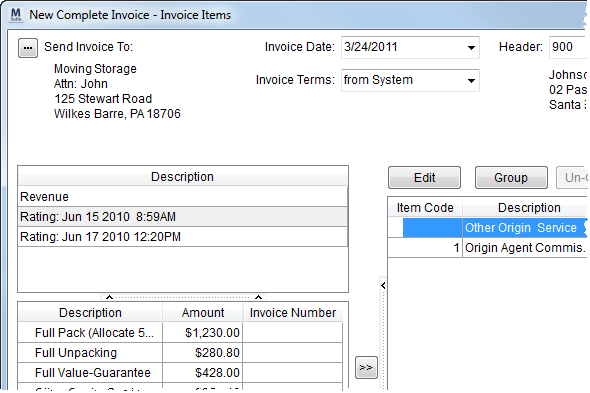
The New Complete Invoice (New Supplement Invoice) screen provides a user the ability to select all revenue associated to an order to base an invoice from. Users can access this screen through the Summary tab or Invoice Management screen by pressing New Complete (New Supplemental) button.
|
Note |
|
The New Supplemental Invoice screen is identical to the New Complete Invoice screen except that the source listing of the New Supplement Invoice includes only those items not currently listed on any active invoice. |
Figure 2: New Complete Invoice screen
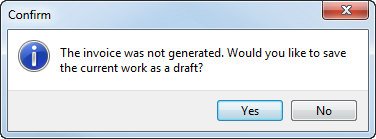
Users will have the option to save a draft when closing this screen. If a draft exists for a customer, the user will be prompted to complete the draft for the order (Yes) or discard it (No).
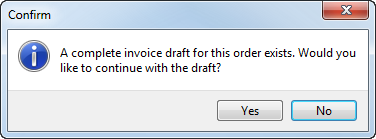
Figure 3: Draft exists confirmation dialog
Only one draft is stored by MoversSuite for a single order regardless of the number of customers attached to revenue items. The draft will not display within the Invoicing data grid and a user will only beware that it exists when the attempting to create a new or supplemental invoice.
The following table displays the fields and functions available within New Complete Invoice and New Supplemental Invoice screens.
|
Field/Function |
Description |
|
Send Invoice To |
The customer and the address where the invoice will be
sent display here. Users can access the Select Customer screen ( If the Remit-To is a van line or if the Invoice Manual Address Flag is set within System Wide Options, then a user can update the customer. |
|
Invoice Date |
This is the date of the invoice and will also be used to compute the late payment date assigned through the Invoice Terms. |
|
Invoice Terms |
Choose the terms that will display on the invoice as one of the following:
None The due date and the payment after the due date will not appear on the invoices.
from customer This setting will pull and display any terms from Microsoft Dynamics GP that have been defined for the customer selected through Send Invoice To.
from System This setting causes the application to compute the terms based on values set within Invoice Terms Setup (based on the branch assigned as the Header).
|
|
Header |
Select a branch or van line to reference for the heading information to display at the top of the invoice. Branches available within this field are those with an Address Type defined in their Branch Setup.
Technical Note: Van lines are defined in Van Line Setup and must be linked to a VanlineAddress table record to display in this field.
|
|
Remit-To |
Select a branch or van line as the location where the recipient should send the payment. Branches available within this field are those with an Address Type defined in their Branch Setup.
Technical Note: Van lines are defined in Van Line Setup and must be linked to a VanlineAddress table record to display in this field.
|
|
Source Description |
Select a source of revenue to import. Once a selection is made, the grid below will populate with items from the source. Note: Sources for invoicing in Revenue Entry differ from those in Claims. For invoicing through Revenue Entry (see Summary), the following sources will be available:
Quotes Accepted quotes appear as sources with a title of “Quote” followed by the actual quote number.
Rating Sends Van line rating sends will appear with a title of “Rating” followed by the date and time of the import. The Amount of the send is the total dollar amount billed to the customer (not the distributed amount), i.e. the amount the moving company will invoice the van line for.
Revenue The actual revenue items generated within MoversSuite appear with a title of “Revenue” for the source. These are the only sources tied to an accounts receivable.
TechMate Import Estimates from TechMate appear with a title of “TechMate” followed by the date and time that the record was imported into MoversSuite.
Figure 4: Source listing
For invoicing through Claims (see Summary (Claims)), the following sources will be available:
Receivables These sources are created through Receivables.
These sources are created by transactions defined within the Revenue tab in the Handling Revenue/Expenses pane in Claims (see Add Handling Revenue).
|
|
Source Items |
Select items belonging to the source to include on the
invoice. Press the right-arrow button ( Selected items will appear grayed-out and a user will not be able to reselect them.
Figure 5: Source item selection menu
The application only allows one invoice item for revenue associated to a particular Item Code; duplicate line items tied to an actual transaction are not allowed. Additionally, the application will merge revenue items that contain the same service code (Item Code) together for all transactions for which the Invoice Flag is set (at either the Item Code level or Revenue Group level).
Invoice Note Specify up to 1,024 characters for a note that will appear below the associated line item. The first 45 characters of this note are included in the EDIInvoice view (Military EDI Invoice Integration).
EDI Code Set an identifier for the line item to link rating information needed for EDI providers (from the list defined within EDI Customer Setup). |
|
|
Edit This function opens the data entry screen corresponding to the type of invoice item the user has selected. Changing data through this function affects the transactions data. The following screens can be accessed through this Edit feature (all in Edit mode):
Note: Users can double-click an invoice item record to evoke the View functionality.
|
|
|
Group Opens the Group Options dialog allowing the user to group one or more invoice items. Use the group option to allow related items to display under one, shared invoice listing. A practical use of this logic is to lump commissions, along with standard transportation charges, into one group titled “Transportation” or to group all materials, such as containers, packing and unpacking (CPU), together to avoiding a confusing invoice. Invoice groups will automatically be created for revenue groups that have the Invoice Flag set and for those items that are linked to an Invoice Group |
|
|
Un-Group This function removes the selected grouping without prompting the user to confirm the request. |
|
|
Add Opens the Add Invoice Line Item screen where a user can create an ad hoc line on the invoice. |
|
|
Delete Removes the selected ad hoc line item without prompting the user to confirm the request. |
|
Invoice Items |
This section lists the items and groups that will appear on the invoice. The order in which they display on the screen is how the items will appear on the generated invoice. A user can move a selected entry by using the arrow keys appearing on the right. The following item move options are available:
Moves the selected record to the top of the listing.
Moves the selected records up one record in the listing.
Moves the selected record down one record in the listing.
Moves the selected record to the bottom of the listing.
|
|
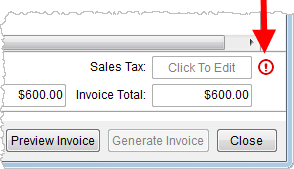
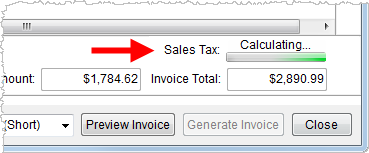
Sales Tax |
If Sales Tax Integration functionality is enabled, a Sales Tax field will be available.
Figure 6: Sales Tax option
If the auto-calculating of sales tax is setup, then the system will compute and display the tax. Otherwise, users will need to press the Calculate button to manually compute the tax.
Each time the line item data grid is updated, such as when ad hoc items are added or a group is added, the Sales Tax will be recalculated.
If an error is generated when attempting to compute the
tax through the Avalara system, users will be able to manually enter the
tax amount. The field will display a caption of “Click to Edit”
where the manually computed dollar amount of the tax can be entered.
Additionally, users can click on the error icon (
Figure 7: Sales Tax error icon
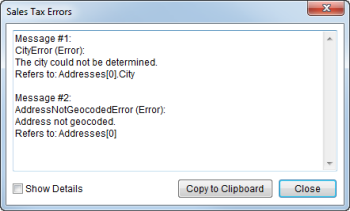
Address Validation In order for Avalara to compute the Sales Tax correctly, it must validate the City, State, Postal Code, and Country of the address referenced as the Point of Service associated to the particular revenue item. For example, if the Point of Service references the Origin address, then the Moving To address (Name, Address, Phone) will be validated. Errors found attempting to find a matching taxable location within Avalara will produce an error dialog.
Figure 8: Sales Tax Errors dialog
Only United States addresses are validated; Avalara has no support for international addresses.
Users will receive a Sales Tax Address Validation dialog when invalid or incomplete addresses are encountered.
All states and countries must be setup within the Avalara system. If not, then the Sales Tax will not compute (without error).
Tax Exempt Customers If a customer is tax exempt and the “Send Invoices for Exempt Customers” flag is set within Avalara Interface Setup, then “Tax Exempt” appears next to the customer information and the application requires sales tax calculation prior to generating/posting an invoice.
See for Sales Tax Integration and refer to the Tax field description within Invoicing more information.
RELATED: Refer to the Point of Service field description within Add Revenue Item.
|
|
Pre-Payment Amount |
Enter the dollar amount received for items being invoiced. This amount is deducted from the Invoice Total and the Amount Due that display on the invoice. This amount does not generate transactions. |
|
AR Amount |
This field displays the dollar amount of items associated to accounts receivables. |
|
Invoice Total |
The total dollar amount of all items listed on the invoice, less any Pre-Payment Amount. This amount is reflected on the invoice as Amount Due. |
|
|
Invoice Note This function opens the Invoice Notes dialog allowing a user to provide a message for the item on the printed invoice. |
|
Invoice Report |
Select a report to render the invoice with from the list of those defined in Report Setup; to appear here, reports must have a System ID of REVI (see System Report ID Setting for details). |
|
|
Preview Invoice This function creates a draft of the invoice and opens a Report Viewer window with the rendering of the Invoice Report document containing all related information for the invoice. The invoice number will be listed as “Draft.” |
|
|
Generate Invoice This function generates the invoice document and opens a Report Viewer window dipslaying the finalized invoice. |
|
|
Close This function closes the screen. The user will receive a prompt requesting to save a non-generated invoice as a draft (Yes) or to discard it (No). The saved draft will be available the next time the user opens the New Complete Invoice screen for the same customer.
Figure 9: Save draft confirmation dialog
|
If revenue for multiple customers exists for an order, then the user will be prompted to select a customer to base the new or supplemental invoice on through the Select Invoice Customer screen.
Generating an invoice when one exists that contains one or more of the same line items will void the original. A user will be prompted when generating the subsequent invoice.
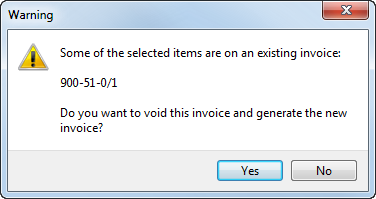
Figure 10: Void existing invoice warning
|
Note |
|
Once the invoice is created a user has options to View the invoice document, to Copy the invoice (which will void the invoice being copied), or Void the selected invoice (see Invoicing). Further, additional invoices can be created for each customer by changing the Send Invoice To option. |
RELATED TOPICS:
Military EDI Invoice Integration
 ) to choose a different customer or
select a different billing address.
) to choose a different customer or
select a different billing address.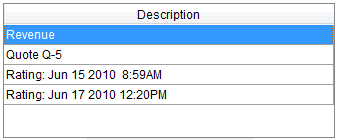
 ) to include selected items and press
the left-arrow button (
) to include selected items and press
the left-arrow button ( ) to remove
items.
) to remove
items.


 ) to see details of the error.