This section describes the process of installing the Customer Web Portal in an Internet Information Services (IIS) environment.
1. Install the Customer Web Portal files to the application server that is hosting MoversSuite,
2. Create a Data directory to store files created by searches performed in the Customer Web Portal. This location will also need to be referenced by the FileLocation pointer set in the global.asa file,
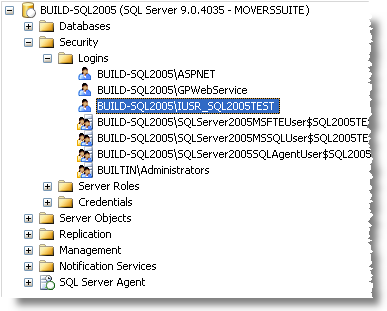
3. Verify the database user that will access the MoversSuite database anonymously using Microsoft SQL Server Management Studio. Contact system administrator to add new database users,
a. Under the correct database server,
Figure 47: SQL Security folder
b. Open the Security folder,
c. Open the Logins folder,
d. Right-mouse click on the anonymous user from the list,
e. Select Properties,
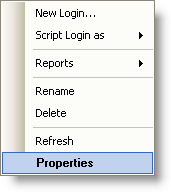
Figure 48: Logins right-click options
f. In the Login Properties window, verify the following:
i. On the General page,
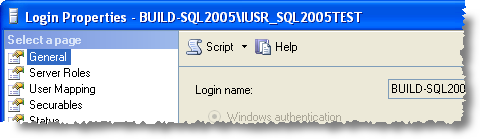
Figure 49: General page within Login Properties
ii. Verify the Login name is correct and will be rendered using Windows authentication,
iii. Set the Default database to MoversSuite2,
g. On the Server Roles page:
i. Set the Server roles to public,
h. On the User Mapping page:
i. Select the MoversSuite2 database reference,
ii. Verify that the MoversSuite2 database is mapped and references the correct User,
iii. Under the Database role membership pane, verify that public and WebPortalExec are checked,
i. On the Status page:
i. Verify that the Permission to connect to database engine is set to Grant,
ii. Verify that the Login is Enabled,
j. Press OK to keep the changes,
4. Create a virtual web site directory:
a. Access Internet Information Services (IIS) application available through Administrative Tools (Start > Control Panel > Administrative Tools),
b. Create a virtual web site under the Default Web Site listing for the hosting computer:
i. Right-mouse click on Default Web Site,
ii. Select New > Virtual Directory. . . and the Virtual Directory Creation Wizard will appear,
iii. Press Next,
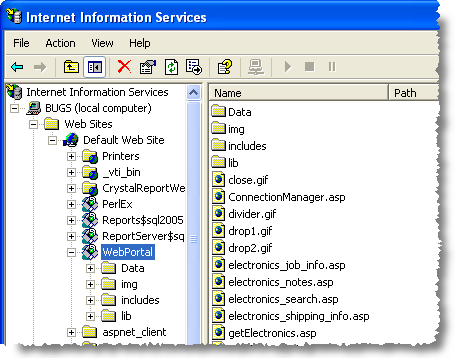
iv. Enter the Alias for the Customer Web Portal file location, such as “WebPortal” (see Fig. 33),
v. Press Next,
vi. Select Browse and locate and select the directory created in Step 1,
vii. Press OK,
viii. Press Next,
ix. Set Access Permissions for Read and Run scripts (such as ASP),
x. Press Next,
xi. Press Finish.
c. Right-mouse click on the newly created directory,
d. Select Properties to access the Properties dialog,
e. Update Virtual Directory properties to be as follows:
i. Set A directory located on this computer,
ii. Set Local Path to the Code folder under the web portal installation directory,
iii. Select Read, Log visits, and Index this resource,
iv. Modify the Execute Permissions to be Scripts and Executables,
v. Set Application Protection to Medium (Pooled),
f. Update Documents properties as follows:
i. Check Enable Default Document,
ii. Add and set login.asp as the uppermost document in the list. Login.asp represents the homepage of the Customer Web Portal,
g. Update Directory Security as follows:
i. Press Edit for the Anonymous access and authentication control as follows:
ii. Check Anonymous access,
iii. Set the User name to that of the database user that will access MoverSuite data (see Step 3).
iv. Check Allow IIS to control password,
v. Check Integrated Windows authentication under Authenticated access,
vi. Press OK,
h. Close the Properties dialog through Apply or OK,
5. Update MoversSuite administrative settings (see Customer Web Portal Setup and Administration):
a. Update global configuration file settings,
b. Add new web user(s),
c. Update moving tips and move planner,
d. Create/update user defined fields and references for Proof of Delivery (POD) documents,
6. Modifying page content for the Active Server Pages (ASP) files located in the Code folder under the installation directory for the Customer Web Portal,
7. Run the following script to synchronize the users on the computer allowing the anonymous database user to be recognized throughout the system:
cscript %SYSTEMDRIVE%\Inetpub\AdminScripts\synciwam.vbs –v
8. Open a web browser and enter the URL referencing the computer’s name and the portal directory as specified through the IIS settings and verify that the login.asp page to the Customer Web Portal appears and that transferees and account representative can successfully access orders.