
Add documents to an order by using the Document icon, indicated in the Figure 132. Hover over the icons to prompt the description “Add one or more documents to the order.”
Figure 132: Add Documents icon
Clicking the Documents icon opens the Add Document screen.

Figure 133: Add Documents screen
There are two ways to add documents. The first is the simplest: Open your file directory, select the document(s) to be added, and then drag and drop them into the “Drag and drop to upload…” section within the Add Document screen. In Figure 134, two documents have been selected from within the file directory, which is open in another screen, and then are being dragged into the appropriate section within Add Document.
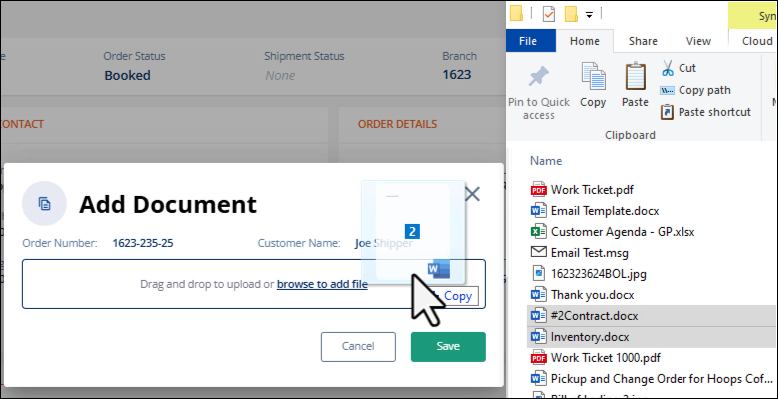
Figure 134: Two documents are being dragged in Add Document to quickly add them to the order.
The second way to add documents to an order is to click the “browse to add file” link. The link is shown in Figure 134. Clicking the link opens your file manager. Locate the file(s) you wish to upload. In the example below, two files have been selected by holding down Ctrl while clicking on the needed files and then click Open. Additionally, files may be “dragged and dropped” from the file directory to into the Add Document screen > drag and drop section from here, as well.

Figure 135: Choosing files from File Manager
For both methods of add files, the files are added to Add Document and will list individually. Document properties can be added on a document-by-document basis using the scroll to access all documents. If all documents are the same document type, save time by clicking the Apply document properties to all button. This button will only appear if there is more than one document being added.

Figure 136: Add document properties to all
Once the Apply document properties to all button is clicked, the screen will condense, as in this example. Enter the Document Type and it will be applied to all documents. The Description will then autoload with Bill of Lading as well. Click Save.

Figure 137: Partial list of Document Type options
The documents will then appear on the Order Timeline. The status tile is yellow, as yellow is color coded to indicate documents. The activity is noted as Added in addition to the notation of the date and time the document as added. Additional details are in the corresponding box to the right, which include who added the document, the Document Type, the Document Description. A link to the document is also included for quick reference.

Figure 138: Order Timeline showing newly added documents
The file type accepted are:
|
Extension |
Format |
|
|
Portable Document Format file |
|
txt |
Unformatted text file |
|
jpg, jpeg |
Joint Photographic Experts Group photo file |
|
png |
Portable Network Graphics file |
|
gif |
Graphical Interchange Format file |
|
docx |
Microsoft Word document |
|
csv |
Comma-separated values file |
|
tif, tiff |
Tagged Image Format file |
|
xls |
Microsoft Excel workbook before Excel 2007 |
|
xlsx |
Microsoft Excel workbook after Excel 2007 |
|
doc |
Microsoft Word document before Word 2007 |
|
xps |
XML-based document |
|
zip |
Compressed file |
|
docm |
Microsoft Word macro-enabled document |
|
rtf |
Rich Text Format file |
|
bmp |
Bitmap file |
|
htm, html |
Hypertext markup language page |
|
xlsm |
Microsoft Excel macro-enabled workbook after Excel 2007 |
|
pptx |
Microsoft PowerPoint presentation |
|
m4a |
MPEG-4 audio file |
|
mov |
Apple QuickTime movie file |
|
wav |
Wave audio file |
|
wma |
Windows Media Audio file |
|
wmd |
Windows Media Download file |
|
wmv |
Windows Media Video file |