

Watch the Overview Video for this release
This section lists the features added to MoversSuite.
|
|
Watch the Overview Video for this release |
Multiple Email Address Support – Phase 2
The Multiple Email Address Support functionality has now been upgraded to let users add multiple shipper email addresses of the types specified in Shipper Email Type Setup. Several screens of MoversSuite application and Admin tool have been updated to let users make use of this feature.
|
IMPORTANT |
|
•For users who previously used to place multiple email addresses within the Email field (Name, Address, Phone screen) on an Order such as “Bob@gmail.com;Linda@gmail.com”, a hot fix will create separate email records on that order, one for each individual email address. •For all such cases, the first email address will be set against the Primary email type, then the second one will be the next email type (in whatever sort order of the email types applies) and so on. •Users who have upgraded from versions before R17, then the R17 upgrade step will address the above. And if someone already is at R17, R18, R19, then when they upgrade to R20 or later, this will also be addressed. |
MoversSuite Application
On the application side, the Multiple Email Addresses Grid has been added on several screens. Starting off with the Name, Address, Phone tab, the new grid now appears next to the Shipper Contact Information grid.
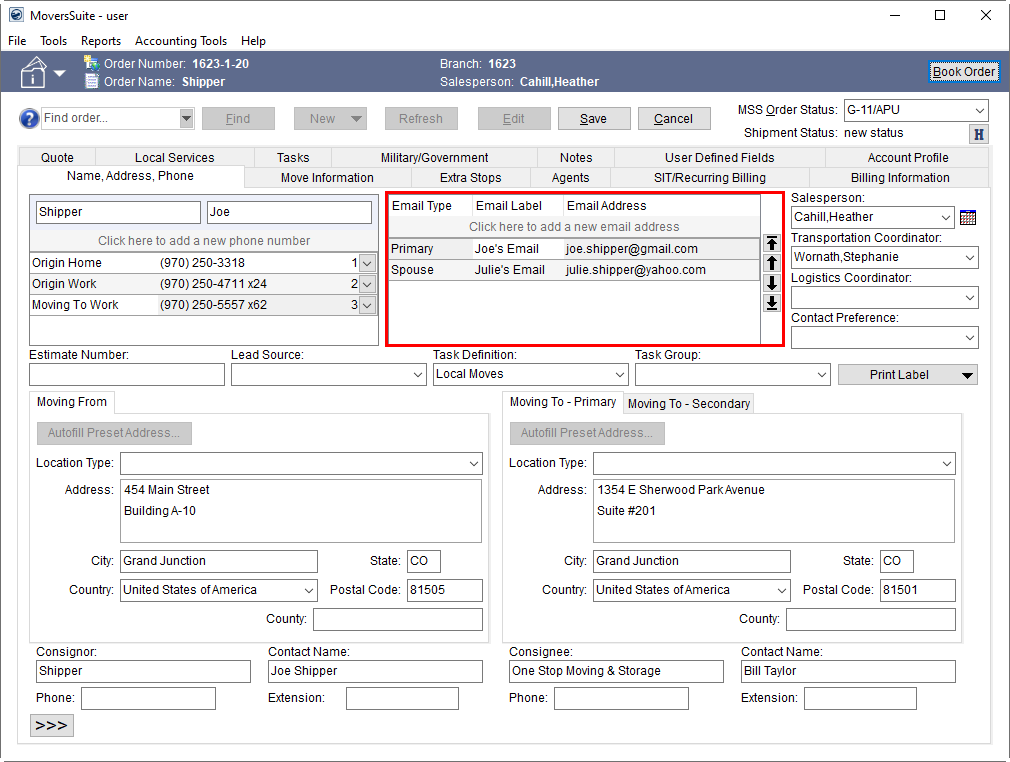
Figure 1: Name, Address Phone tab
To add multiple email addresses, open the order in edit mode and click on the empty space to add a new email address.
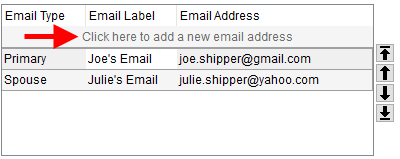
Figure 2: Multiple Email Addresses Grid
Use the Email Type dropdown to select any of the types added through the Shipper Email Type Setup and provide an Email Label and Email Address against each type. You can provide an email label of your choice to identify the email type and provide the corresponding email address in the Email Address dropdown.
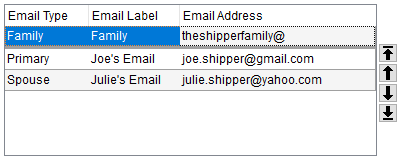
Figure 3: Multiple Email Addresses Grid
By default, the email types in the dropdown are listed in an alphabetical order but they can be sorted using:
•The
arrow keys to the right of the grid to move the record to the top of the
listing:  , up one record:
  , down
a record:
, down
a record:  , or move it to the bottom:
  .
.
•Sort order text box in the Shipper Email Type Setup
The email type that makes it to the top of the grid is referenced on reports, forms, and other places that were referenced when only a single email existed on the order, i.e. prior to upgrading to this release.
Of note, the Multiple Email Addresses Grid validates the provided email records for any logical errors and upon saving, an error window collectively displays all the errors if it finds any of the following:
•Email Type dropdown left empty
•Email Label field left empty
•Email Address field left empty
•Duplicate Email Type
•Missing email prefix in the Email Address field
•Missing email domain
•Use of multiple “@” symbols
To send an email to any of these email addresses through MoversSuite Email Service, simply double click a record or right-click on any of the record and click Send Email.
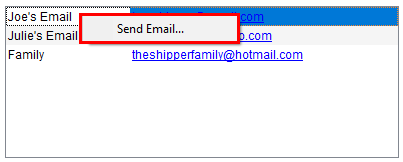
Figure 4: Multiple Email Addresses Grid
Note: You can send an email to more than one recipient at a time by using the Ctrl+Select method and then selecting the Send Email option through right-click menu.
To delete a record, open the order in edit mode, right click the record to be deleted and select Delete Email Address.
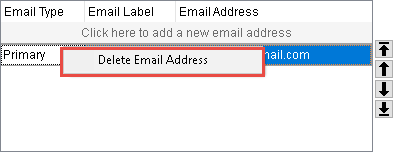
Figure 5: Multiple Email Addresses Grid
In addition to the Name, Address, Phone tab, the Multiple Email Addresses Grid has been added on the following screens with the same features and behavior as described above:
Order Information (Revenue Entry)
Order Information (Office & Industrial)
When generating messages through the MoversSuite Email Service, the application provides you with a list of email addresses referenced within the email grid on the order. The name referenced is the assigned label prefaced by “Order: “. For example, if you have a “Primary” email type with “Joe’s Email” assigned as the label, then when adding email addresses, this address shows up as “Order: Joe’s Email.”
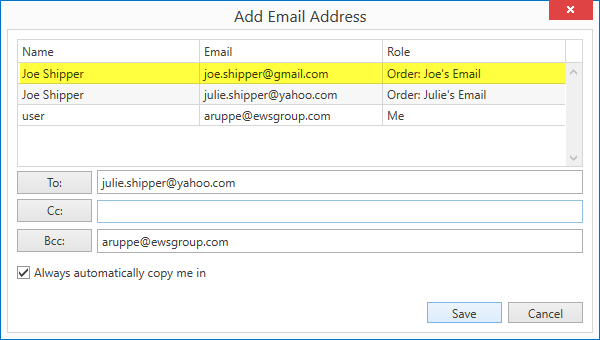
Figure 6: Add Email Address dialog
MoversSuite Admin
On the admin side, the Shipper Email Type Setup area has been tweaked to let users add Interface Items and to provide a Sort Order.

Figure 7: Shipper Email Type Setup
Provide a numeric figure in the Sort Order field to give this email type a priority number. For example, if the sort order of an email type is “0”, it will appear at the top of the email type dropdown in the application and the subsequent sort orders will follow.
NOTE: If no Sort Order is specified, the application displays the types in alphanumeric order within the drop-down.
The Interface Items tie the email type to different interfaces with which the application integrates. This functionality is used when leads or orders are to be imported or exported. To specify a default email type for any of the interfaces, add the interface items through the Add Interface Item button and provide an external code of “DEFAULT EMAIL”. This will mark this email type as default for the set interface and will be used in case of import and export.
In the example below, the “Primary” email type is being set as the default email type for UniGroup International.
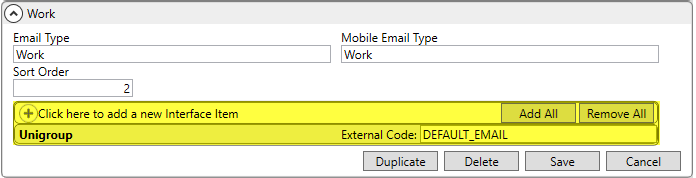
Figure 8: Shipper Email Type Setup
Note that when you upgrade to this release, MoversSuite provides your organization with several default Email Type records. Additionally, MoversSuite will automatically assign default Interface Items for you based on the existing settings within your system. Therefore, you may not need to do anything to take full advantage of this feature.
Feature Summary
•The Email Addresses Grid is available on Name, Address, Phone tab, Sales Lead Information form and Order Details screen.
•Double click on an email address record to send email
•You can also send email messages to one or more addresses through a right-click option of “Send Email”
•You can delete an email address record through the right-click option of “Delete Email Address.” This right-click option is only available in Edit mode.
•The order for email addresses provided in the grid can be adjusted using the Sort Order in Shipper Email Type Setup or through the arrow controls given next to the grid.
•The email address that is on the top of the grid is referenced for the order on reports, forms, etc.
•You can customize the Label attached to the email address
•The label associated to the email address is reference when adding address through the Forms Designer system
•Custom bookmarks are built upon each type specified on your system, so that you can include them in your Forms Designer templates
•Upon duplicating an order, all the existing email records provided through this feature are copied along.
Refer to Shipper Email Type Setup, Name, Address, Phone, Sales Lead Information and Order Details topics for more details.
|
SUMMARY (5633) |
|
Multiple Email Address Support – Phase 2. |
|
The following areas have been affected by this change: Order Information (Revenue Entry) Order Information (Office & Industrial) Schema Changes Version 2020R17
|
SIRVA Integration: STS Replaces sHub Order Download
The SIRVA sHub Integration module of the SIRVA Integration has been replaced by SIRVA STS Integration. With this update, MoversConnect now communicates with SIRVA Open API Services for SIRVA Download Request.
The SIRVA Download Request option continues to reside in the Tools Menu but its communication with the mainframe sHub has been replaced with SIRVA’s new STS mainframe system. Of note, upon booking an order, when you provide the Order Number, the application will automatically disable the SIRVA Registration Upload option in the Tools Menu and you are only allowed to use the SIRVA Download Request.
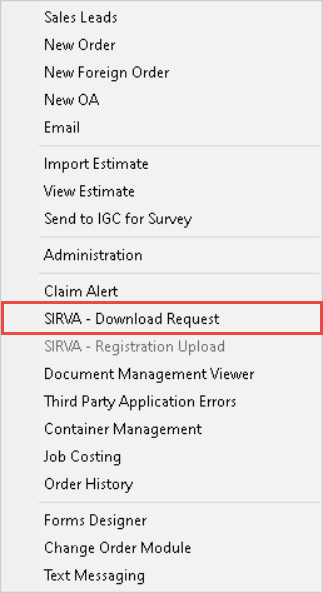
Figure 9: Tools Menu
|
NOTE |
|
The application filters the orders based on the year present on Vanline Registration Date (Agents tab). |
The order download request no longer requires login credentials and only the Order Number along with Vanline Registration Date is used as the order identifier.
|
IMPORTANT |
|
Make sure that your API service has write permissions to your system accessible folder where you want to import the orders. Refer to XML System Setup (SIRVA) and XML System Options (SIRVA) topics in case you encounter a problem in SIRVA Download Request. |
When the SIRVA Download Request is evoked, the MoversConnect contacts SIRVA and the status of the import request is displayed at the bottom of the Name, Address, Phone screen. Other than the server contact status, any status updates that display at the bottom of the screen, are shown as it is on the Third Party Application Error Management screen as well.
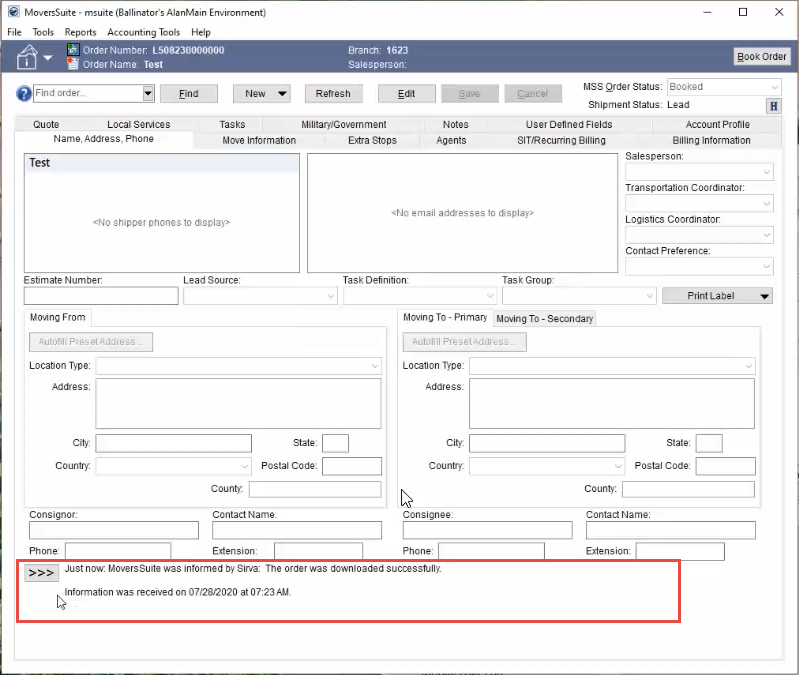
Figure 10: Error Message at the bottom of Name, Address, Phone tab
Moreover, the  button can be used as a shortcut,
anytime you wish to view the Third Party Application Error
Management screen. In case you want to clear this message, you can delete it
from the Third Party Application Error
Management screen.
button can be used as a shortcut,
anytime you wish to view the Third Party Application Error
Management screen. In case you want to clear this message, you can delete it
from the Third Party Application Error
Management screen.
Note: Once the import is complete, press the Refresh button on the Name, Address, Phone screen and the imported fields will be populated in the application.
Refer to SIRVA Download Request Content topic to know which fields are downloaded and populated in MoversSuite upon an import.
Refer to SIRVA STS Integration and SIRVA Download Request topics for more details.
|
SUMMARY (5793) |
|
SIRVA Integration: STS Replaces sHub Order Download. |
|
The following areas have been affected by this change: Schema Changes Version 2020R17
|
SIRVA Integration: STS Replaces sHub Registration Upload
With SIRVA STS Integration replacing the sHub mainframe SIRVA Integration, the MoversConnect communicates with SIRVA Open API Services for SIRVA Registration Upload.
The SIRVA Registration Upload feature continues to function as it was, previously, through the Tools Menu option. If while creating a lead for SIRVA upload, no Order Number is provided, the application will automatically disable the SIRVA Download Request option in the Tools Menu and you are only allowed to use the SIRVA Registration Upload functionality.
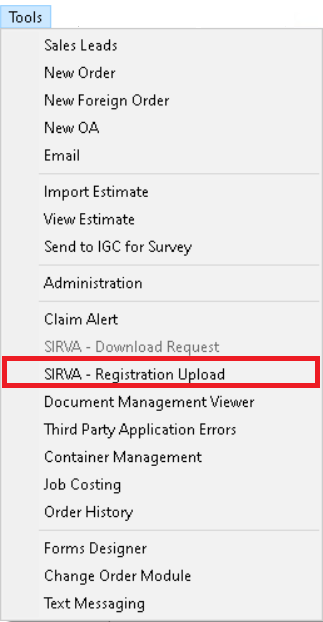
Figure 11: Tools Menu
Make sure that the mandatory fields outlined in the SIRVA Registration Upload Content topic are filled and click the SIRVA Registration Upload option.
The SIRVA - Registration Request screen has been updated to ask for login code only and the password field has been removed. Continue providing the SPLC codes for Pickup (Origin Address), Delivery (Destination Address) and All entered Extra Stops as before.
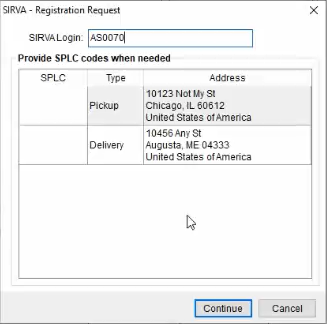
Figure 12: SIRVA - Registration Request
When you press the Continue button, the message area at the bottom of the Name, Address, Phone screen will keep you updated with the upload status.
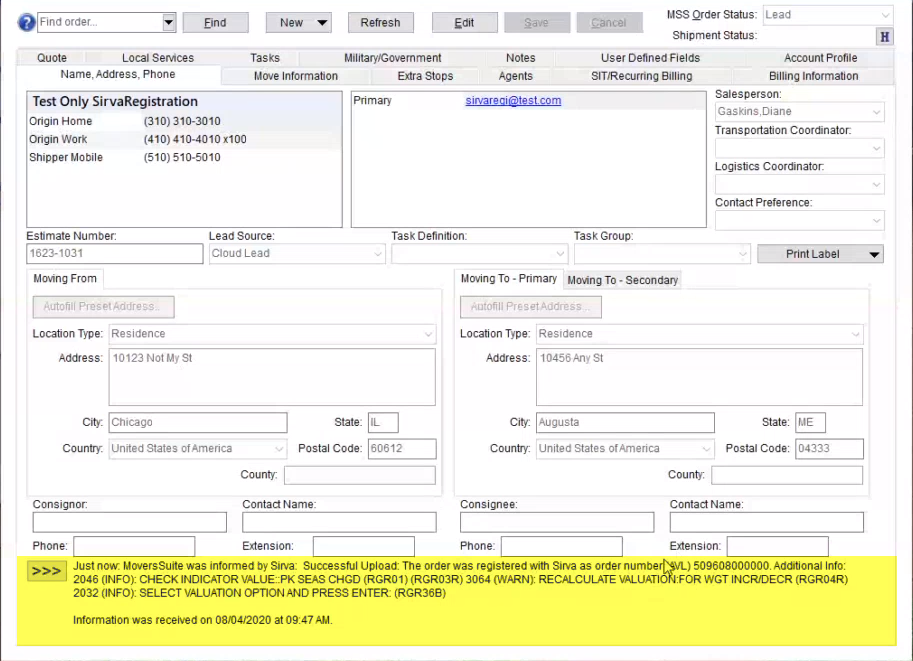
Figure 13: Name, Address, Phone tab
Optionally, you can click the button to open up the Third Party
Application Error Management screen. The Third Party Interface Order
Monitor no longer displays the status. Here is how a typical successful
upload message will look like:

Figure 14: Third Party Application Error Management screen
Refer to SIRVA STS Integration and SIRVA Registration Upload topics for more details.
|
SUMMARY (5835) |
|
SIRVA Integration: STS Replaces sHub Registration Upload. |
|
The following areas have been affected by this change: Schema Changes Version 2020R17
|